Search This Blog

30.12.12

1 HOW TO FIX 'NOT RESPONDING' ERRORS IN WINDOWS.

When using Microsoft windows,we sometimes encounter a ‘Program Not Responding’ error which can be quite frustrating especially when an important work is being done.

Sometimes,it may even cause the System to freeze-up thereby forcing a re-start.
In the process,all unsaved datas will be lost.

Though,this problem is common only with Windows XP,as newer versions of Windows do not need a re-start to fix these kind of issues.

When this error comes up in Windows XP,a message box appears asking if you'd like to report the problem to Microsoft.
If you do not wish to,you can click on this dialog box to make it disappear.

So in today's write-up,we will cover the basic steps on how to disable this feature if you find it somewhat distracting and so also fix Windows when this error occurs.

How To Disable Error Reporting In Windows XP.

  1. Right-click on “My Computer” and select ‘Properties’
  2. From the Properties window,click on `Advanced́ tab and click the “Error Reporting” button.
  3. Check the box next to “Disable error reporting” and leave the other unchecked i.e “But notify me when critical errors occur”
  4. Finally,click on "OK".
That's all for disabling the error message.
Now,to fix the problem,follow the instructions below.
  1. Launch the Task Manager by right-clicking on the Taskbar at the bottom of the screen and selecting ‘Task Manager’ or in the case whereby the system hangs up,you can access the Task manager by holding Ctrl + Alt + Del and selecting it from the list of options.
  2. Click on “Applications” tab and locate the program not responding.
    You can do that by checking the status of all open applications.
    [All applications not responding have Not responding as their status.]
  3. Next, right-click on the program to end and select “End Task”.
    ‘OK’ it.
Now,you can exit the task manager and see your OS fixed.

Contributions and/or Suggestions are highly welcomed.
But please,if you need responses to your questions,do not comment as ‘Anonymous’

28.12.12

6 HOW TO FORMAT UNFORMATABLE FLASH DRIVE/MEMORY CARD.

These days,almost everyone knows the usefulness of Flash drives and/or Memory cards and makes use of it for transferring and receiving files between different devices.

But sometimes,the pendrive might get infected during these numerous uses and formatting it becomes the only solution.

However,whilst trying to format the flash/Mcard,using the normal method (i.e “Right-click on the device and selecting Format”), an error message pops up stating `Windows was unable to complete the format́ then what else can be done?

In this tutorial,I'll be giving some really easy tricks to get rid of these error-messages and format any memory card or Flash.
But before proceeding,I'd like to wish all readers of this blog “Complements of the season”.
Now to do this,just follow the steps below and try using all methods if the former doesn't work for you.

How To Format Unformatable Flash drives & Mcards.

#Method 1 » Command Prompt.
  1. Click on Start » Run, type cmd in the text box and select “OK”.
  2. Type-in the following command and hit 'Enter'
    Format/x K:
    Note that "K" in the snippet above represents the Removable Disk Drive letter/Name and it may be different in your case,so you'll need to replace it with whatever it displays in your computer.
Now,that should solve it.

Confirm if the drive is formatted.
If not try the second method.

#Method 2 -Registry↓
Note that this method can be resolved to only if the Pendrive is write-protected.
  1. Detach the drive.
  2. Click on “Start” button and search for “Run”.
  3. In the textarea of the pop-up box,type Regedit and hit 'Enter'.
  4. Now,navigate to HKEY_LOCAL_MACHINE\SYSTEM\CurrentControlSet\Control\StorageDevicePolicies
    • If you cannot locate StorageDevicePolicies,then you'll need to create it.
    • Right-click on Control and choose New » Key and name it StorageDevicePolicies
  5. Right-click on the newly created key and click on New » DWORD value.
    Name it WriteProtect
  6. Now,double-click on it and change the Value Data to 0.
    Click on "Ok".
  7. Finally,insert the Flash drive/MCard back into the system and try re-formatting it using the first method above.
If that still doesn't change anything,then the final resort is to download this usb format application
HP USB Disk Storage FormatTool 2.2.3
DOWNLOAD IT HERE.

That's all.

If the Pendrive is still adamant after trying everything above,then it's advisable you get a new one.

Feel free to share your experience.

20.12.12

3 HOW TO MAKE COMPUTER WELCOME YOU WITH A VOICE MESSAGE ON STARTUP.

Have you ever seen or heard a computer welcome its Owner before either in a movie or in the real world?
Would you like to give your Pc this look of professionalism?

Well if yes,then you are right on track.

In this tutorial, I'll be sharing with you a cool trick to make your computer welcome you by mentioning your name each time you switch it on.

So,to activate this awesome feature,just follow the steps below carefully...
Step 1 »
  1. Launch / Open Notepad (Start » All Programs » Accessories » Notepad)
  2. Copy - Paste the code below in it →

    Dim speaks, speech
    speaks="Welcome to your PC, Da Soljar"
    Set speech=CreateObject("sapi.spvoice")
    speech.Speak speaks

  3. In the code snippet above,Replace “Da Soljar” with your name or any other name
  4. Click on “File” menu and select “Save as...”
  5. Next,select “All Files” from the `Save as type` option and save it with any name.vbs
    E.g
    Welcome.vbs
  6. Now,copy the new notepad file and navigate to
    C:\Documents and Settings\AllUsers\Start Menu\Programs\Startup if on Windows Xp.
    OR
    C:\Users\ {Your User-Name}\AppData\Roaming\Microsoft\Windows\Start Menu\Programs\Startup for Windows vista, Windows 7 & 8 users.
  7. Note 
    "AppData" is an hidden folder.
    So to access it,just press the windows key and search for “showing hidden folders”.Once found,just select it and click on “OK”.
  8. Paste the copied text document in it and exit.
The next time you start your Computer,you will be welcomed with the "welcome message" specified in the code above.
Note: This can be changed to anything.
Step »
In order to ensure that this customized welcome tone isn't over-ridden by the default windows tone,it is advisable the sound scheme is changed to “No sound”.
Here's how to go about it...
  1. Navigate to the Control Panel.
  2. Click on Switch to Classic View»Sounds and Audio Devices
  3. Next,click on the Sounds tab and choose No Sound from the Sound scheme options.
  4. Finally, click on OK
That's all.
You can never know how interesting it is until you try it out.

So,anytime you start your Pc,you should be greeted with your customized greeting.

Have fun...
Please,do share with your friends.

11.12.12

3 HOW TO ADD “WORD/CHARACTER COUNTER” TOOL TO BLOGS.

In one of our previous posts,we discussed a topic which is “HOW TO ADD HTML ENCODE/DECODE-TOOL WIDGET TO BLOGS.”.
And just as mentioned in that tutorial,the tool being made mentioned here was also provided by http://centricle.com.

Many at times,you might be asked to include a keyword while registering for a service online not 'More than or Below' a specified number of words and/or character.
This tool comes really handy in such a situation as you do not have to start counting every single letters manually.

Likewise as a blogger, you might want to count the number of characters in your post title as its often said that "Maintaining a below 60 is best".

Now,to add this tool to your blog,here's an easier way of doing that.

  1. Login to your Blogger dashboard.
  2. Navigate to Layout » 'Add a Gadget' » 'HTML/JAVASCRIPT' and Copy-Paste the code below into the text box.
  3. *Alternatively,you can create a page for it [Learn how to create pages in Blogger.]
  4. <form action="http://centricle.com/tools/word+character-counter/" method="post" target="blank"> <fieldset> <label for="pad">String:</label> <textarea cols="60" rows="15" name="pad" id="pad"></textarea> <input class="submit" type="submit" name="countem" value="How Many?" /> </fieldset> </form>

  5. Save the widget and that'll be all.
HERE'S A LIVE DEMO OF THE WIDGET.

That's all!!!

5.12.12

0 HOW TO DISABLE/ENABLE USB PORTS ON COMPUTER.

Securing sensitive and personal informations/files on a PC can sometimes be threatened with the presence of USB ports,therefore you might consider disabling them.

Disabling of USB ports on a Computer is an extremely easy task which can be done through the Registry.(if you have access to it.)

So,here in this tutorial,I'll be guiding you on steps to take in order to disable it on your system.

How To Disable Access To Usb Ports On A Computer.

  1. Click on “Start” and navigate to “Run”[you can use the search] or by simply clicking the Windows button + R.
  2. Type “regedit” in the text box and hit “Enter”.
  3. Now,navigate to HKEY_LOCAL_MACHINE\SYSTEM\CurrentControlSet\Services\UsbStor
  4. Click on UsbStor and at the right-panel,double click “START”
  5. Now,in the Value Data box, set the hexadecimal value to 4 and finally click on “OK” and exit the Registry editor.
That's all for disabling USB ports.

Now,if you would like to re-enable an already disabled port,just:
Follow the instructions above and on getting to the Value Data box, replace “4” with 3 and that would be all.

3.12.12

1 HOW TO UNMASK A SHORTENED URL.

Nowadays, we often check a website's url over & over again to atleast ensure it doesn't look fishy.
But in a case whereby the url has been masked,then what do we do?

If you are not familiar with the term “URL masking”,it simply means using free services provided by some websites such as TinyURL,Bit.ly,goo.gl...to make extremely long URLs short and also to hide a specific link from being viewed directly.

So,to unmask/view a masked url, here's what you need do »

  1. Get the url you want to unmask
    E.g http://tinyurl.com/dxk2jdq
  2. Visit http://www.unshortn.com and paste the url in the text box(You can use the above url).
  3. Finally,click on “Make Longer →” which is directly below the text box and you should see the real link live & direct.
That's all.
You can use this service to certify which website the link is pointing to before actually visiting it.

12 HOW TO FIX “TASK MANAGER HAS BEEN DISABLED BY YOUR ADMINISTRATOR” ERROR IN WINDOWS.

Task Manager can be said to be one of the most useful applications on a Computer system.
It really comes handy in occasions whereby some softwares can't be stopped or is Unstable.
It's also the 'number 1' choice to check all running processes,monitor CPU Performance etc.

But,what happens in the case it becomes inaccessible due to malwares or viruses? and you keep getting some funny errors like “Task manager Disabled by Administrator”?

So, if you've been getting this error while trying to access your task manager,here is a fix to enable it again.
There are different methods available to fix this problem on your PC and I'll be explaining two extremely easy methods here in this tutorial.

METHOD #1:-Registry Editor.

  1. Click on “Start” and navigate to “Run”[you can use the search.]
  2. Type “regedit” in the text box and hit “Enter”.
  3. Now,navigate to
    HKEY_CURRENT_USERS\Software\Microsoft\windows\currentVersion\Policies\System
  4. Once located, you'll see “Disabled Taskmgr” option at the right pane.
    Simply delete it or double click on it and change its value to “0”

METHOD #2:-Through the Group Policy.

Alternatively,if you do not find a “Disabled Taskmgr” key in Registry,then try this »
  1. Click on “Start” and navigate to “Run”[you can use the search.]
  2. Type “gpedit.msc” and hit Enter.
  3. Navigate to Configuration » Administrative Templates » System » Crtl+Alt+Del Option » Remove Task Manager
  4. Once found,right click on it to choose “Edit” and select “Not configured”.
  5. Finally apply & OK it, then exit.
That should fix it.But,if the Task Manager still refuses to be accessible, you can try scanning your PC for malmares.

That's all..
Any suggestions/questions?, kindly drop them here.

29.11.12

0 HOW TO REMOVE/HIDE RECYCLE-BIN ICON FROM DESKTOP.

As we all know,trying to hide/remove the Recycle bin icon from the desktop is almost impossible,as Microsoft didn't provide with an easy solution to that.Recycle bin.jpg

Meanwhile,you might want to get rid of all icons on the desktop,in order to show a plain desktop-background.
So in order to do this,some steps will be taken...

In this tutorial,I will be guiding you on different ways/methods to go about this.

For Windows Vista,7 & 8 users.

Method 1:-
  1. Right click on desktop and select Personalize
  2. From the Personalize appearance and sounds window,click the “Change desktop icons” link on the left-hand side.
  3. Finally,uncheck the “Recycle bin” box.
  4. Note »
    To revert your actions,just follow the procedures above and re-check the “Recycle Bin” box.
Second Method...
This method is a little complicated,so I'll advice you to adhere strictly to the steps below...
How to remove recycle bin icon from desktop
  1. Click on the “Start” menu icon and navigate to “RUN”(or use the search).
  2. Type regedit in the text area of the pop-up and click on “OK”.
  3. Navigate to HKEY_LOCAL_MACHINE\SOFTWARE\Microsoft\Windows\CurrentVersion\Explorer\Desktop\NameSpace
  4. Now,find and delete this registry key
    {645FF040-5081-101B-9F08-00AA002F954E}
If you feel the registry is too risky for you to edit,then do this ↓
  • Click on “Start” menu icon and navigate to “RUN”(or use the search).
  • Now,copy paste the following snippet of codes in the text-area
    Reg Delete HKEY_Local_Machine\Software\Microsoft\Windows\CurrentVersion\Explorer\Desktop\NameSpace\{645FF040-5081-101B-9F08-00AA002F954E}
  • When prompted to confirm the delete,just type y and select “OK” or hit Enter.
  • The icon will now be deleted from the desktop.
  • To undo hiding,just change “delete” from the code above to “add”[Without quotes].
That's all!!!
How To Remove The Recycle-bin;-For Windows XP Users.
  1. For windows XP users,download & install “Windows TweakUI”.
  2. Launch / open TweakUI and click on desktop at the right.
  3. Now from the Desktop section, uncheck the “Recycle Bin” box and click “OK”
That'll be all.
Please do not forget to share this post with your friends, and likewise leave your thoughts behind!!!.

28.11.12

0 TRICK TO MAKE A COMPUTER`S KEYBOARD GO DISCO.

Have you ever wished you knew how to make your computer keyboard's-light go 'Disco'?
Have you longed for this feature in your computer, or you're just getting to know this for the very first time?
Then this post is for you...
Disco-light.jpg

The idea behind this trick is just to have fun / show off to friends, though some consider it rather annoying.
You don't need to have any coding/programming knowledge,as it's extremely easy to do.

In this tutorial,we'll be making use of this popular Computer application i.e Notepad.
Note:-
This illuminates & looks more fascinating in the dark.

Here's How To Do This.

  1. Open/Launch notepad [Right click on desktop » New » Text document].
  2. Copy - Paste the following codes into it ↓
    Set wshShell=wscript.CreateObject("WScript.Shell")
    do
    wscript.sleep 100
    wshshell.sendkeys"{CAPSLOCK}"
    wshshell.sendkeys"{NUMLOCK}"
    wshshell.sendkeys"{SCROLLLOCK}"
    loop
  3. Finally,save the file with a “.vbs” extension using any name.
    E.G Disco-light.vbs
  4. Now to start the effect,just double click on the newly saved text file to see the magic.
That's all.

If you think you don't like this effect,you can easily stop it by 

  • Hold keys “Ctrl + Alt + Del” and select Task manager
  • Locate wsscript.exe,select it and choose “End Process”.
  • Note : If your mouse doesn't respond any longer,just hold down the "Alt" key while you navigate.
Have Fun!!!

Also Read...

HOW TO EASILY FORMAT COMPUTER'S HARD-DRIVE USING NOTEPAD.
CREATE WORKING ANTI-VIRUS YOURSELF USING NOTEPAD.

27.11.12

0 HOW TO DISABLE ALL SYSTEM BEEPS.

You often hear annoying beeps emanating from your computer system when the Windows Pc is trying to warn/relay a message to you.
ComputerBeep.jpg

This sound often comes unexpectedly and sometimes catches the attention of others unnecessarily which is 'way' disturbing when in a Library or some other silent place.

Muting the computer in this case will not stop these beeps,as they are caused by an internal speaker.
So,what do we do in this case?

We simply disable all beeps...

Steps On How To Diable All Computer Beeps.

  1. Click on the “START” menu button and select “RUN”.
  2. In the pop-up window,type “Regedit” and select `OK`.
  3. From the Registry-Editor window at the left,navigate to HKEY_CURRENT_USER » Control Panel » Sounds
  4. Now, double-click on Beep at the right-side and change its value to No
  5. Click Ok, close the wizard and reboot the computer.
That's all.
To undo the changes,just follow the procedures above and change the value back to Yes.

26.11.12

0 HOW TO CUSTOMIZE Windows7 LOG-ON SCREEN.

Windows7.jpgThe Windows 7 Log-on screen is what we make use of almost every time to Lock our Computer, Log OFF, Swith User, Change Password, Start Task Manager...
But,you might want to restrict other's access to these options.

If you're new to the Computer world & do not know how to access this screen,just press CTRL + ALT + DEL.

So,in this tutorial,I'll be giving a detailed guide to customize the log-on screen of your Windows7 to meet with your wants.

Here's How...

  1. Click on “Start” button.
  2. In the search, type “gpedit.msc” and hit ENTER.
  3. Navigate to User Configuration » Administrative Templates » System
  4. In the right pane,locate Ctrl + Alt + Del and double click it to open.
  5. Next,you'll notice different options from the screen to Enable/Disable the log-on-options.
  6. They include
    Remove Change password, Remove Lock Computer, Remove Task Manager, Remove Log Off...
  7. Double click on any option to disable it and finally select OK
That's all.To confirm changes, just click on “Ctrl + Alt + Del” again.

23.11.12

12 TOP BLACKBERRY SECRET CODES.

As we ought to know,every device has its own hidden features which can only be unlocked with the help of secret codes.
Amongst others,we have treated some of them in the past.
They includeblackberry logo.jpg

In today's tutorial, we'll be listing some of the Major and most-popular of this widely-used mobile phone.
Here they are...

  1. The first is the code which works on virtually all mobile devices to check their IMEI number i.e *#06#
  2. Hold “Alt” down & press “RBVS” in the Address Book »To view the source code of webpages.
  3. Hold “Alt” & press “NMLL” »
    This is called the Decibel meter.
    It shows the phone's signal-strength in decibels instead of bars
  4. Address Book data structure rebuild.
    |This forces a data structure re-build in the Address Book.|
    Hold “Alt” & press “RBLD” in the Address Book to do this.
  5. Address Book file verification
    This checks the data in your Address Book for inconsistencies.
    Hold “Alt” & press “VALD” in the Address Book.
  6. To do a “Soft” Reset,which is thesame as Removing the battery for a few seconds.
    Press & hold “Alt”, then hold left-“shift”, then hold “Del”.
  7. To view the "Help Me! menu" for crucial technical information about the device,
    Hold “Alt” & (left) “shift”,then press “H”
  8. To view the Event-Logs,
    Hold “Alt” & press “LGLG”
  9. blackberry.com
    Note 
    The codes below will work mostly when you are viewing the home-screen.
  10. A or C »Phonebook
  11. S » Search.F » Phone's profiles.
  12. W or B » Browser. H » help.
  13. K » Locks the keys.
  14. L » Calendar.
  15. V » Messages.
  16. M » Messages folder. R » alarm.
  17. T »Tasks.
  18. U » Calculator.
  19. I » Applications.
  20. O » Options.
  21. P » Phone.
  22. T » Top of page (in browser).
  23. »B » Bottom of page (in browser).
  24. Space » Page down (in browser).
  25. D » Memo pad.
  26. U » Switch between hide/unhide in browsers title-bar.
  27. ALT + NMLL » To use numbers instead of bars for signal strength.
  28. ALT + Right Shift + Del » Hard reset.

20.11.12

13 HOW TO SPEED UP COMPUTER USING MOBILE PHONES AS RAM.

Do you have a Computer with less RAM size?
Does your PC hang every now and then?
Do you feel like throwing your Laptop in the waste-bin just because of its crawling state?

Well,if that's the case of your Computer,worry no more because we are about to turn all that to history.

You will quite agree with me that a computer tends to become less & less active compared to when it was first purchased.
This could be linked to several factors which cannot be listed here,but most especially when a heavy job is being done on it.

Running Computer.jpg

In this tutorial, we will be looking at some powerful devices that can be used to speed-up a computer 10 times over.
You don't have to spend some extra bucks to get these devices, as they are what we have around us.

Guess what... ,they are our Mobile phones, USB flash drives, Flash memory cards...
With the help of ReadyBoost, these devices can be used to fasten-up the speed of a 'frustratingly' slow computer.

Using ReadyBoost Application To Speed Up Computer.

Like I mentioned above,the whole idea behind using a Mobile device,Memory Card... as RAM[Random Access Memory] is made possible with ReadyBoost App. which is present in virtually all computers.

Here's How...

  1. Connect your Mobile Phone/Flash Memory card to the Computer using a USB chord or a Card reader.
  2. From the list of options that pops up on your Mobile phone,choose “MASS STORAGE”(For Blackberry users,choose USB Drive
  3. Note
    If you're using a Memory card,then you should skip the step above.
  4. Scroll to the bottom of the AutoPlay list that pops-up, and click on “Speed Up My System”.
  5. Now,the ReadyBoost window will be displayed. Just tick the option which says “Dedicate The Device To ReadyBoost”
  6. Next, check to ensure the "speed level" is at 4094MB, then Apply and finally click on OK
That's all!!! You can now feel the power of speed.
NOTE
If in any case the ReadyBoost window does not display,then it means your PHONE/SD CARD'S available memory is not up to the needed amount.

You can try getting rid of useless files from your phone / SD card until you have something like 950MB& above free.

TIPS
card reader.jpg
  • It's advisable you get a dedicated SD card for this purpose,so as not to lose important files.
  • Always remember to back-up your files to your system if in any case you'll be deleting some files on your Mobile phone.
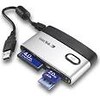
  • For Laptop owners, it's recommended you use a Card-reader, because you can't always go about with your Phone connected with a USB chord.
If you need further help as regarding this tutorial,please do let us know.
Your contributions are also very valuable.THANKS...

19.11.12

0 HOW TO INSERT PICTURES IN FACEBOOK CHAT.

Chatting on Facebook these days, has gone beyond just typing to relay messages.
Different emoticons have been introduced over the years to help users easily express their mood while chatting with friends.emoticons.jpg

But,how good will it be to use a personal image to express our feelings?
Well,here comes the great news...
It's now possible to make use of images instead of the old-common emoticons available in the facebook chat.

In one of our previous posts,we discussed on how you can easily go offline on facebook chat without having to log-off / sign-out of facebook.
So,if you'd like to remain present on the chat,here's a quick tip to make it more fun.

How To Use An Image As Emoticon In Facebook Chat

  1. Visit Smileytime's homepage and navigate to Choose File.
  2. Click on it and choose a picture to upload.
    Once chosen,fill out the Captcha image and click Upload now.
  3. Next,COPY the codes displayed on the screen and PASTE it directly in the chat box.
  4. Finally,click on enter to see the image display live in the chat.
It's as easy as that,but if you'd like to display your profile picture or any other person's profile pics,you don't have to go through the stress of uploading it.
All you need do is follow the simple instructions below...

How to Use A Profile Picture as Facebook Chat Emoticon

Note »
You can use this style to display not only a users profile pics, but also that of Facebook pages and groups.

So,here's how.
  1. Visit the Profile page of the User/Page/Group which you want to use the pics.
  2. Get the Username/ID [learn how to get facebook Id(s) of facebook users]
  3. Write out the Username / ID of the user and add “[[ ]]” at the beginning and end of the username.
    E.g [[bayosola]] or [[Techfreeplanet]].
    Infact,you don't have to be friends before you can use the person's image
    E.G “zuck” for Mark Zuckerberg
  4. Finally, click Enter and the whole texts/numbers will be converted into an image.
THAT'S ALL.
So either way,you can easily use a special image instead of the regular facebook emoticons available.

Have Fun Chatting!!!.

18.11.12

0 HOW TO COPY/EXTRACT TEXTS FROM IMAGES EASILY ON COMPUTER.

Today,I'll be introducing to you a Pc software capable of copying/extracting text from any image.

Though there are some other applications capable of doing a fine job,for the benefit of this tutorial we'll be making use of “GT TEXT”

GT Text [Ground Truth Text].

Like mentioned above,GT Text is a 'freeware' software which allows its users copy text from picture files easily without having to pass through the stress of writing-out/re-typing every bit of words in a picture.

It comes handy when you're dealing with tasks involving images with words/quotes im-printed on it.
Sometimes,you might even take shots just for the texts in it e.g Taking images of an event's address on a poster/Bill board etc....

To use “GT Text”,just follow these easy steps...
  1. Visit the Software's download page [65MB] and download the latest version of the freeware.
  2. GT TEXT.JPG
  3. Once downloaded,install the program and run it.
  4. From the File manager that pops up,select which type of image you want to copy texts from and browse to the folder containing the image.
    Supported images include .jpg, .png, .gif, .BMP, & .TIFF.
  5. Next,select “Open” and when the image finish loading,click on the “Area Text OCR”
  6. Now,click and drag your mouse to highlight from the image the area you want to copy,then release the mouse.
  7. When released,an instruction pops-up.Just click on “Continue” to copy the highlighted section to the clipboard.
  8. Now,open your notepad and paste the text there.
If you'd like to extract the whole texts from the image,then you can easily do that by navigating to Tools » Copy Text From » Full image or by simply clicking on CTRL + F.
So either way,all text appearing on the image will be automatically saved to the clipboard.
Thereafter,you can do whatever you please with the text i.e editing,saving...

DOWNLOAD GT TEXT.[65MB]

THAT'S ALL. Hope you get the most out of the software.

15.11.12

0 HOW TO GO “OFFLINE” ON FACEBOOK CHAT WITHOUT SIGNING-OUT.

Chatting on Facebook can sometimes become so infuriating with different people trying to chat with you when you're not in the mood to.
Turning off the chat feature then becomes the only option.

However,in a case whereby you wish to chat with 'just' a particular person/group of persons,this becomes impossible as the whole chat has been disabled & thereby left with one solution which is to go “online”.

Luckily,its now possible to decide who to see you online/offline.
In this tutorial,we'll be discussing on how to easily go offline to a particular contact or some group of contacts without actually disabling the whole chat.

Here's How...

  1. If you want to go offline to so many contacts at once, the best way is to group them together in a particular list.
    To do this,
    • Search for “LIST” at the left corner of your facebook wall and click “More”
    • Next,click on the button which says “Create List”.
      In the pop-up window,name the group you're hiding using any name.
    • Now,input/enter the names of your friends you want to hide from and click “Create”.
    • After successfully creating the list,in to the chat box & click on the “gear button/options” and select “Advanced chat settings”
    • From the pop-up, select the option which says “All your friends see you except…” and enter the name of the list that was created earlier.
    • Finally,click on “SAVE” button to go offline to all friends included in the list.
    • NOTE »
      Whenever you feel like un-doing the hiding,just go back to the option which says “Advanced chat settings” and delete the list's name.Then select "Save".
  2. To go offline to just one person at a time
    Open your friend's chat window and click on the “gear button/options” and select “Go Offline To...”
NOTE »
Using the second method i.e Going offline to just one person, the person won't see you online,but you can still chat with them.

That's all.
Got any contributions and/or questions?,do not hesitate to leave your comments behind.

11.11.12

3 HOW TO EASILY FORMAT COMPUTER'S HARD-DRIVE USING NOTEPAD.

Notepad is 'sure' more useful than just creating & editing text files.
In some of our previous tutorials,we've learnt some stuffs we can use the Notepad for.
Amongst them is →

So today,we'll be talking on yet another great usefulness of Notepad,which is
“How To Format Your Computer's Hard-drive Using Notepad.”

PC Harddrive.jpg

Though,some people consider this trick as a virus to format a system,I don't think it is.
So,if you have an issue with your PC,and you think the solution is to format it,here's an easy way to do just that. Just follow the instructions below carefully.

Steps To Format Computer Hard-disk With Notepad.

  1. Click the “START” button » All programs » Notepad [OR just search for "Notepad" using the search option]
  2. Once notepad is launched, Copy-Paste the binary codes below into it
  3. 01100110011011110111001001101101011000010111010000 100000011000110011101001011100 0010000000101111010100010010111101011000
  4. Now,Save it by navigating to File » Save or by simply clicking on CTRL + S(Give it any name you like).
  5. Once you've saved the notepad,change the extension from “.txt” to “.exe”
  6. Finally,run/launch the saved file and your hard-disk will be formatted automatically.

TIPS.

  • If you can't rename/change the file extension,it means the Display of file extension has been disabled.
    To change it,go to My computer » Tools »Folder Options » View,then uncheck “Hide Extension For Known File Types”
  • Never try this unless you're sure you want to format your PC.
  • Always try to Backup your drive before formatting it.
For further questions pertaining this trick,do not hesitate to leave your comments behind.

ALSO READ 
Create Working Antivirus Yourself Using Anti-virus.
How To Format Computer Using Codes.

9.11.12

0 HOW TO LOCK & UNLOCK A COMPUTER USING MOBILE PHONE'S BLUETOOTH.

Today,I'll be introducing to you yet another great Pc software.
It's such a handy software which makes securing of Computer easier.

Each passing day,new applications are being created to make the usage of computer simpler and less complex.
Amongst them is Bluetooth Proximity(BtProx).

Bluetooth Proximity is an application designed for Windows Vista and Windows 7.
It detects a paired mobile device and locks/Unlock the Computer based on the number of seconds/minutes set.

With Btprox,you do not need to worry about leaving your Computer-system running whilst leaving the room as you're rest assured its locked out of intruders might.
One other thing which makes this software a must-have is its nice feature of unlocking when you enter into the room.
Though,this feature is not fully functioning in some Systems(as complained by users),it does work on most Windows 7_64 Bits(Tested).
Likewise,the founder of this app. has promised a fully functioning software in newer updates.

The whole idea behind this software is to help save the stress of racking the brain to remember the shortcut to lock the computer without passing through a whole lot of stress.

Requirements of BTPROX.

  • Bluetooth-enabled Mobile phone.
  • A computer with embedded bluetooth[Not sure if it works with an external bluetooth adapter].

How To Lock/Unlock Computer Using BtProx.

To begin with this tutorial,download the latest Bluetooth Proximity HERE
  1. Install the application on your Computer
  2. Run/Launch it.
  3. Minimize it and go to your Bluetooth Suite to pair your Mobile phone with the Computer[If done,then skip]
  4. Next to “Used device:”,click on “…” to select the paired Mobile device.
  5. Bluetooth proximity.jpg
  6. Once done,choose a default “Timeout” for your Computer to lock/unlock itself by directly inputing it or by clicking-on the Up-Down buttons.
    The minimum time is `0 min./60 sec.[No maximum]`
  7. Finally,click on “Start” to begin the lock command based on the number of minutes set for it to lock.
TIPS
  • Always set the timeout to 0 min. To save phone's battery life.
  • Try muting the Laptop so that intruders won't be notified of the lock due to the beeping sounds
  • When the specified mobile device is within range/the app. is running smoothly,the icon turns ORANGE.
    If it turns RED,then the device is out of range & the system is about to be locked automatically.
  • Whenever your switch-off your mobile phone's bluetooth,then the software sees it as “Out Of Range” and prepares to lock
  • To abort/end the application,simply click on the “STOP” button.
That's all.
With this,I believe the security of your Computer will be maximized.

7.11.12

0 HOW TO RUN JAVA(.Jar) GAMES & APPLICATIONS ON A COMPUTER.

Do you know you can run a Java application on your computer?
Have you ever thought of playing your favourite Java games on your Pc?

Now,all these have been made possible with "KEmulator".
Though,this might not be new to some old computer geeks,it indeed is for newbies.

KEmulator can be simply put as a Software designed to specifically run Java files on a computer.
As it is,'Java' is one of the most widely used programming languages in the universe.
Application developers tend to create more of Java files compared to developers in other platforms,and these files sometimes comes really handy which makes them un-neglectable.

Steps On How To Run Java Softwares On A Computer.

  1. Download KEmulator to your Pc[Link available below] and extract the contents of the zip folder to a new folder.
  2. Preferably,create a shortcut to the folder for faster accessibility.
  3. Next,run the application and you'll see a pop-up which looks exactly like the image below
  4. Now,to play or run a software,navigate to “Midlet” at the top-left corner of the screen and click to browse through your system.
  5. CHANGING THE SCREEN-RESOLUTION ~ At this point,newbies get frustrated with the default screen resolution which is by default set to display a Mobile phoneres. of 176 * 220 as they do not know how to tweak it.

    To change these values,go to View » Options and change it accordingly
    Note that you'll need to re-start the software for changes to take effect.

  6. Set a custom network proxy to make-use-of when you run a browser.This is also accessible from view > options.
  7. Lastly,you will need to configure the key-map to function as you deem-fit.
  8. [DOWNLOAD KEMULATOR HERE.]
Those are the main things to be known in the application.
If you need further assistance using the software,please use the comment box below.

29.10.12

3 HOW TO USE SYMBIAN PHONES AS HOTSPOT TO BROWSE THE INTERNET ON COMPUTER.

Connecting a computer to the internet is becoming lot more easier day-after-day with the development of new & great Softwares.Connected devices over wifi.jpg

In a post sometimes ago,I shared with us » “How To Connect A Computer To The Internet Using An Android Device.”
So,you don't have an Android Phone?,don't worry.
In this post,I'll be sharing with you yet another great software which works on Symbian S60 phones..
It's called “JOIKUSPOT”

JOIKUSPOT.

Joikuspot.jpgJoikuspot is a software-solution that simply helps to turn a Symbian Phone to a secure mobile WLAN(Wireless Local Area Network) Hotspot,i.e With Joikuspot,an S60 phone is converted to an open Wifi/Wlan Hotspot which can be used to connect a Computer to the internet to surf the web using a “Joikuspot generated mobile wifi access point”.

It was developed by JoikuSoft,with series of updates ever since its creation in 2008.

While installing the app.,you'll be prompted to select a language which is best understood by you.
Some of the featured languages include »

  • English (U.K & U.S.A)
  • French
  • German
  • Spanish
  • Italian
  • Swedish
  • Danish
  • Norwegian
  • Finnish
  • Portuguese
  • Turkish
  • Russian
  • Dutch
  • Slovenian
  • Chinese
  • Japanese
  • Arabic
  • Hebrew
  • Ukrainian
  • Indonesian
  • Korean [and much more]

Using Joikuspot for internet connection is extremely easy.
It doesn't require Bluetooth connections,neither does it require the usage of USB chords.

Just follow these simple steps →
  1. Download Joikuspot to your phone (Download Link Below)
  2. Install it on your device (Click “OK” to by-pass all pop-ups)
  3. Once installed,you'll be required to reboot your phone.
  4. Launch the application and select a valid Access point to turn your phone into a Wifi hotspot[3G Modem].
  5. Scan for “Open wifi networks” using your high-grade desktop/laptop.
  6. Once found,select “Connect” and you're ready to surf the net on your computer.
Note »
It's necessary for you to have data bundle on your sim-card for Joikuspot to work.

Some of the supported phones include
Nokia N8, E7, C7, C6, N900, E51, E52, E55, E60, E61 , E61i, E63, E65, E66, E71, E72, E73, E75, N78,N79, N80, N97, 808, 5800 and much more.

[DOWNLOAD JOIKUSPOT PREMIUM VERSION 3.10]
(Get the upgraded version from Nokia Ovi-Store)

That's all.If you're not clear with anything,please do not hesitate to use the comment box below.

ALSO READ
“How To Connect A Computer To The Internet Using An Android Device.”

27.10.12

0 HOW TO READ PDF FILES ONLINE.

It's a clear-cut fact that reading of “Pdf” files nowadays,isn't something which requires much technical dexterity to carry out,as almost all new modelled devices come with an embedded Pdf reader.
pdflogo.jpg

Likewise,third-party softwares are available to perform this task on devices which do not posses the feature.
But,how about previewing these files before actually downloading them on our mobile phones?

While surfing through the net,I came across this cool feature of Google which enables us to read pdf files online using absolutely any type of browser.

With this trick,you don't have to worry about downloading some junk pdf-files anymore.

Here's How…

  1. The first step is to get the url of the pdf file to read [Address should end with a “.pdf” extension]
  2. Visit http://google.com/gwt/x using any browser.
  3. Copy-Paste the address of the e-book to read(.pdf) in the text-box provided.
  4. If you would like to hide all images embedded in the ebook,just check the box which says “Hide Images”.
  5. Finally click on ́Go` button to load the pdf file.
  6. (Try out this file as an example »
    http://www.grandmascraftguides.com/basichtml.pdf)
It's as easy as that.
The page loaded will be the mobile-formatted version which supports any type of mobile phone.

Please,don't forget to share with your friends and also share your experience with others!!.

26.10.12

0 BEST ANTI-MALWARE SOFTWARES FOR SYMBIAN PHONES.

While downloading and installing different applications on mobile phones, it sometimes becomes exposed to viral attacks.

Securing the phone,thereby becomes essential at this point.
Just as the saying goes,“Prevention is better than cure”,
It's better to guard against these attacks than searching for an engineer to format the phone.

In this tutorial,I'll be giving you a list of Anti-virus(es) to secure your Symbian phones with.

  1. Netqin Anti-virus.
    As at the time of publishing this post,this software can be said to be the best amongst others.
    It possesses so many great features which makes it outstanding from others.
    Below are some of Netqin's features…

    Features Of Netqin Anti-Virus.

    • Apart from the normal “Full scan” feature,it has the ability to scan specific files/folders on a mobile phone,which makes it relatively faster.
    • It lets users update the “Virus DataBase” easily to provide 99.9% protection against latest virus threats.
    • It has the “Safe mode” function which when clicked-on,closes all Non-system applications to return the phone back to its normal state.
    • An Anti-lost tab is also present to help guard against easy data access and phone usage in case the phone gets lost[Avialable for to Pro members only].
    • “Contact Backup” ability which saves all phone contacts.
    • “Network Firewall” tab where you can manage all phone internet connections from[Allow/Disallow specific application's access to the internet.]
    • Get full information about all app. installed on the phone,allow/disallow auto-boot of specific app. from the “System manager” tab.
    • Get logs of all activities performed on the software.
      AND SO MUCH MORE WHICH I CAN'T FINISH MENTIONING…
      [DOWNLOAD IT HERE]
  2. Rising Anti-virus.
    This is another great functionality software which does not only guard against malwares,but also empowered to perform other genius functions.

    Features of Rising Anti-Virus.

    • It comes in two languages i.e English & Chinese.
    • It has a more customized scanning ability to Netqin,as it allows you to choose whether to scan…“Running Processes”,“Phone memory” or “SD card”.
    • It has the ability to block calls when set to do so.You can keep Blacklist/Whitelist contacts and decide to receive calls from just numbers present in the Whitelist.
      In other words,you have the ability to block specific numbers from calling your mobile phone.
    • You can protect certain files on your phone directly from this software,as it renders it un-usable.
    • Finally,this app allows the viewing and managing of all running Processes on the smart-phone.
      [DOWNLOAD IT HERE.]
  3. Kaspersky Mobile Security (KMS)
    This is also one of the greatest mobile anti-virus of all time.
    Just like the others,it possess so many great features which we'll be brushing over…

    Features of K.M.S

    • Just like the above mentioned softwares,it also allows for customized scanning.
    • Amongst others,it has an option to unzipping archives in order to search for any form of malicious codes
    • With this software,you can scan all bluetooth-recieved SMS & MMS.
    • You can set the app. to start a full scan anytime.
      Though,this feature in present in others,it is more customizable in KMS.
    • It also possess an Anti-theft function to guard against private information leakage in case of theft.
    • It has a “Gps Find” option to track mobile phone down when lost/stolen.
    • Unlike R.Antivirus software above,KMS has both Sms & Call filter ability which lets you receive calls & sms based on the compiled Black/White lists
    This application possesses much more functionalities,but those are the key features.
    [DOWNLOAD IT HERE]
There are so many others,but in my perspective,the above mentioned comprises of all key-features of those other anti-viruses.

24.10.12

6 HOW TO EMBED “WINDOWS MEDIA PLAYER” IN BLOGS.

Writing a great article sometimes,isn't complete without embedding a video and/or an audio file to it.

It is highly required when you are posting a practical tech-related tutorial or most times on a news niche,whereby the file makes the post even more explanatory.

So,what if you have the link to a video,how do you embed it in a blog(post)?

In this tutorial,I'll be showing you two easy ways to embed the Windows Media Player in a blog to stream live videos & audio files for visitors to easily watch and listen to.

[Video adapted from google.]

Here's How...

  1. The first way is by adding the media player as a gadget in the sidebar.
    • Login to Blogger.
    • Navigate to Layout » `Add a gadget` » HTML/JAVASCRIPT
    • Copy-Paste the code below and save the widget.
  2. The second method is by embedding the player in each blog-post.
    This can be done by pasting the code below in each post.

Here's the Media-player's code...

<embed type="application/x-mplayer2" pluginspage="http://www.microsoft.com/Windows/MediaPlayer/" name="mediaplayer1" ShowStatusBar="true" EnableContextMenu="false"
autostart="false"
width="350"
height="250" loop="false"
src="VIDEO/AUDIO LINK" />

CUSTOMIZATION.

Change the settings of this player to suit you (Optional).

Autostart→ Change this value to "True" if you want the video/audio to start streaming automatically upon visiting the post[Not recommended].
Width/Height→ Change these values respectively to suit you taste.
Loop→ Force the video/audio to loop constantly.

That's all.Just make sure you get a valid url.

3 HOW TO ADD HTML ENCODE/DECODE TOOL WIDGET TO BLOGS.

There are times whereby you might need to post an Html tag as plain text most especially for bloggers in “Blog niches”.
It is also needed when a visitor has to write some codes in the comment box.

Although,Blogger has really made it easier to post “html” codes as plain text in the New blogger dashboard,it still isn't helpful in situations when you need some other tags to function in a post.
So,to solve this,a tool has been provided by Centricle.com to make posting of codes easier and faster.

Here's How It Works...

When a html code is inputed in the textbox,the “Encode” button needs to be pressed,and the result when posted,is shown as live codes.

To integrate this widget in your blog,just Copy-Paste the following code snippet preferably into a Page[Learn how to create pages on blogger.]

Here's the code...

<form action="http://centricle.com/tools/html-entities/" method="post" target="blank">
<fieldset>
<input value="y" name="s" type="hidden"/> <label for="pad">Convert text to HTML entities and vice-versal:</label> <textarea id="pad" rows="15"cols="60" name="pad"></textarea> <input value="Encode" name="submit" type="submit"/> <input value="Decode" name="submit" type="submit"/>
</fieldset>
</form>

Live Demo

That's all.If you need further information about the usage of this tool,do not hesitate to leave a comment behind.

23.10.12

0 HOW TO ADD A “PRINT PAGE” BUTTON TO BLOGGER BLOGS.

Adding a “Print Page” button to a blog is another way of generating little traffic to it,as visitors are given the option to print an entire article without stress,and by so doing can boost the traffic of your blog through Word-of-mouth,online forums etc.

So,if you'd love to include this button on your blog,this post will show you how…

  1. Login toBlogger.
  2. Navigate to Templates » Edit HTML[Always remember to backup your template.]
  3. Check the box next to
    Expand Widget Template
    and search for </head> by pressing CTRL+F.
  4. Next,Copy-Paste the code below directly above/before it.
  5. <style type="text/css" media="print">
    #noprint {display: none;}
    // Hide unwanted elements
    body {background:fff; color:000;}
    // Black text on White background
    a {text-decoration: underline; color:00f;}
    //Underline Hyperlinks in blue}
    </style>
  6. Once done,search(again) for <p><data:post.body/></p>
  7. When found, Copy-Paste the following code snippet directly below/after it.
  8. <a href="javascript:window.print()">Print Page</a>
  9. Preview the template to avoid errors and thereafter, Save it.
That's all.

19.10.12

1 HOW TO AUTOMATICALLY DELETE FIREFOX HISTORY WHEN EXITED.

In the previous post,we discussed on “How To Delete Google Chrome Browser History Automatically” when browser is exited.
So still on thesame issue,we will be studying how we can do this on Firefox browser.Firefox.jpg

By default,Firefox browsers are set to save all Browsing history,cache & cookies,but we're about to change all that.
Though,all these can be deleted manually,it's much more better having the job done automatically

To do this,just follow the instructions below carefully…

  1. Launch Firefox browser
  2. At the top-left-corner,click on the Firefox button and select “Option” from the dropdown menu.
  3. Next,click on the “Privacy” and right below the “History” section,select Use Custom Settings for History.
  4. Check the box which states “Clear History when Firefox Exits”,then confirm it(OK).
So,if you'd like to further customize the browser to delete specific datas,just click on “Settings” which is right next to the option in the last step above i.e “Clear History when Firefox Exits”.
Finally,choose which datas to delete upon exiting the browser and “OK” it.

That's it.
Now,each time you exit your browser,all datas will be deleted without leaving any traces behind.

ALSO READ »HOW TO AUTOMATICALLY DELETE GOOGLE CHROME BROWSER HISTORY.

18.10.12

2 HOW TO AUTOMATICALLY DELETE GOOGLE CHROME BROWSER HISTORY.

Privacy is one thing every human being loves to have.
Browsing the net on a shared computer becomes a risk when it comes to securing secretive/personal informations.

Sometimes,we may even forget to log-out of an account before exiting the browser,thereby making such account-infos vulnerable to easy access by anyone.

To guard against this,some precautions needs to be taken to ensure that these informations do not leak in the slightest.

In this tutorial,I will be giving you the trick I use in clearing all my browser history and cache automatically upon exiting.
Even as a Cyber-Café owner,the privacy of your patronizers should be of utmost importance to you,so this tutorial should come handy.

Google chrome.jpg

Automatically Delete Google Chrome Browser History.

So,if you use Google chrome browser on your Pc,all you need do is follow these simple steps…
    STEP 1
  1. Launch Google chrome.
  2. Click on the wrench menu to select settings.
  3. From the Settings tab,click on “Advanced settings” and navigate to “Privacy settings”.
  4. Click on the “Content settings” button and check/tick the box which states “Clear Cookies and Other Site and Plugin Data When I Close My Browser”
  5. Once done,you can try it out to see all your privacy datas and browser history deleted each time you exit the browser.

STEP 2

Note,this step is not compulsory,but you might want to consider retaining a specific site's history i.e Each time you visit a specified site,all history regarding that site is not automatically deleted when exiting the browser.

To do this,follow the steps below »

  1. Click on the “Manage exceptions” button which is located below the “Cookies settings”.
  2. Include the URL of the site you want to keep in the exceptions box.
That's all.Now,everytime you exit the browser,the entire cookies,cache and history of all sites which are not included in the exceptions list will be deleted. automatically.

16.10.12

0 HOW TO COPY DATA FROM SCRATCHED CDs & DVDs.

Have you ever come across the error “Data not readable” while trying to recover/copy a data from your aged or scratched CDs and DVDs?
Have you ever wished you could get those important files back?,then worry no more…

This problem often surface when you are trying to use a scratched disk/a disk which has not been used for a very long time,thereby making the datas contained in it lost forever.

But,here comes the good news.
There is this Computer software I discovered which is powerful enough to help copy those datas which are embedded in such a disk.
It's called “COPYCAT”

Just as the name implies,this software copies all those datas from the disk directly into your system.

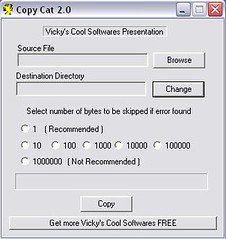
CopyCat.

CopyCat is a software developed by VCSoftware.
It helps to copy-out maximum bytes from a disk which an ordinary Windows copying cannot handle.CopyCat Screenshot.jpg

It skips totally-unreadable-bytes and extracts all datas which are still readable to the system for future referencing.

Features Of CopyCat.

  • It copies maximum data from unreadable Hard disks,Pen drive, Floppy drive, and other media drives.
  • It gives the option to skip bad area when found unlike Windows Copy operation which halts.
  • It copies data from highly damaged media ~ byte by byte.

TIP
From the image above,you will notice a command stating »
“Select number of bytes to be skipped if error found.”
Just choose 1 which is the Recommended value.

To get CopyCat on your PC,|FOLLOW THIS LINK.|

THAT'S IT.
Please leave your comments and reviews behind.

14.10.12

0 HOW TO USE AN ANDROID PHONE'S CAMERA AS WEBCAM.

Android Phones over the years,has really developed to an astonishing level with new features being added to every new model.
This has made the device handy in so many occasions.

In one of our recent tutorials,a tip was given on “How an Android phone can be used to connect a computer to the internet.”.

So in this Tutorial,we'll be learning another great tip of the Android Mobile.

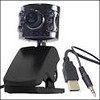
webcam.jpg

Do you have a Computer without webcam?,
Do you have an Android Phone?
,then you need not buy a separate Cam again,because you can easily turn your device into a Webcam to chat with your friends on Facebook,Skype,GTalk etc.

All you need do is follow these simple instructions...

How To Turn An Android Phone Into Webcam.

Android logo.jpgFor the benefit of this tutorial,we'll be making use of an application called “SMARTCAM” which supports both Bluetooth and WIFI connection.
Here are the download links
SMARTCAM for ANDROID.
and
SMARTCAM FOR COMPUTER[Windows & Linux supported]

Get both Softwares for the respective devices and let's proceed...

Using Wifi Connection.

  1. Establish a connection between the Android phone and Computer.To do this,
    • Launch SmartCam on mobile.
    • Navigate to Menu » Settings » TCP/IP (Wifi) and input the Local IP address of your computer.
  2. Launch SmartCam on PC and set connection type in the SETTINGS to TCP/IP (Wifi).
  3. Turn-on Wifi on your Android phone and connect your phone to the network your Pc is connected to.
  4. Finally,select “Connect Wifi” from the Android application's menu.

If done properly,you should see an image of your phone on your desktop.

THAT'S ALL.

NOTE »
To chat using this application,in to your Chat application's preferences/settings and select “SmartCam” in video settings.

Is it Tricky?
Do you have a question or contribution to make?
Please let us know by leaving your comments behind.

0 HOW TO CHAT WITH FACEBOOK FRIENDS ON OPERAMINI.

Chatting on facebook with Mobile Phone has never been easier.
Facebook-mobile Logo.jpg
With the introduction of Facebook's Buddylist,you can easily get in touch with your pals without going through a whole lot of stress.

In this tutorial,I'll be giving you a quick tip on how you can chat with your Facebook buddys using Opera-mini.

All you need do is Copy-Paste the URL address below into your Opera's address bar to see your online friends live.

Here's The Link...
https://touch.facebook.com/buddylist.php

Note,this doesn't work on other browsers such as UCbrowser,QQbrowser etc
Only OperaMini[Any version.]

If you require any further information,please do let us know by leaving a comment behind.

12.10.12

0 HOW TO CONNECT A COMPUTER TO THE INTERNET USING AN ANDROID PHONE.

It's no longer a story that you can connect a computer to the internet via Mobile Phones,but “HOW” remains the question.
connect phone to computer.jpg

So,do you have a Computer & an Android Phone?, here's a quick one on how you can do just that.

Steps To Connect Pc With Internet.

  1. Connect your Android Mobile to the internet with your inbuilt browser (Wifi/Packet data).
  2. Connect Phone to Computer using a cable.
  3. usb cable.jpg
  4. Select Wireless & Networkfrom your Android phone's settings.
  5. Next,select Tethering and Portable hotspot.
  6. Finally,Check USB tethering & Portable Wi-Fi hotspot.
That's all.
You can now open your Computer's browser to browse the internet.

11.10.12

0 HOW TO WATCH VIDEOS ONLINE WITHOUT BUFFERING.

Many are times whereby you need to watch an important video online,but the network keeps f**king up.

It can be really infuriating when you have to pause the video just to load or leave it to keep buffering every few seconds.

Now,you might want to ask what the solution is?
Well,if you are addicted to watching Youtube videos,here is an easy solution.
All you need do is follow the instructions below.

For the benefit of this tutorial,you will have to download any of these Media players i.eReal player or VLC media player if not already installed on your computer.

Steps To Follow...

Before proceeding with this,visit Youtube or any other video sharing website and click on which video you intend watching.
Next,right click on the video to get the URL.
Once gotten,replace “www” with “m”.

USING REAL PLAYER.

  1. Launch/Open Real Player.
  2. Select File then “Open”.
  3. Finally,paste the copied url there to load the video.

USING VLC MEDIA PLAYER.

  1. Launch/Open VLC player.
  2. Select File » Streaming.
  3. Now,paste the copied URL in the window that pops-up.
  4. Finally,click on Stream button to load and play the video.
That's it!!!

IMPORTANT NOTE:
Since the video is formatted for Mobile viewing,it's highly compressed,so you may not enjoy it as you would when viewing directly.

10.10.12

0 HOW TO RECOVER ACCIDENTALLY DELETED MESSAGES ON MOBILE.

This tip is no longer a new one,but recently I was asked by a friend on `how he could recover a deleted message on his phone`,and I was like “So,this trick hasn't actually circulated”

Well,if you happen to have such questions,then Read on»

Before we proceed,note that “This trick doesn't work for SymbianV3 phones”
Now,make sure you have a File manager installed on your phone [X-PLORE or FEXPLORER]

Recovering Of Deleted Messages On Symbian Phones.

  1. Open/Launch X-plore.
  2. Navigate to C: if your messages are stored on “phone memory” OR D: if on external device.
  3. Locate System » Mail and click on it.
  4. Now,you should see different files/folders named 001001_s,0010001_s,00100001_s etc.
  5. Finally,open these files using the Explorer's default Hex viewer by locating it in the options {options»File»Hex/Text viewer} or by simply clicking “3”.
That's it.
TIP:
Once you locate the message you are looking for,copy/move it for easy reference.

If you have any suggestions/contributions to make,please feel free.

8.10.12

25 RANDOM BANNER WIDGET FOR BLOGGER BLOGS.

There are so many reasons you might want to add a banner to your blog site.
Adding a “Random banner widget” makes it better for any website.

It helps to manage space and is very useful in promoting affiliate links.
So in this tutorial,I'll be giving you an easy-to-use widget which can be modified to suit your taste.

Steps On How To Add Random Banner To Blogs.

  1. Login to Blogger.
  2. Navigate to Layout » “Add a Gadget” » HTML/JavaScript
  3. Next,Copy - Paste the code snippet below

    <script language="JavaScript">images = new Array(3); images[0] = "<a href='ADVERTISER'S URL' rel='nofollow'>
    <img src='URL OF BANNER'S IMAGE' border='0' height='60px' width='450px'> </a>";images[1] = "<a href = 'ADVERTISER'S URL' rel='nofollow'>
    <img src='URL OF BANNER'S IMAGE' border='0' height='60px' width='450px'> </a>"; images[2] = "<a href='ADVERTISER'S URL' rel='nofollow'>
    <img src='URL OF BANNER'S IMAGE' border='0' height='60px' width='450px'>
    </a>";index = Math.floor(Math.random() * images.length); document.write(images[index]);
    </script>

  4. Finally,SAVE the widget and preview your blog to ensure it's working.
If you need further information about this widget,please leave your comments behind.

Also Read

HOW TO ADD ADVERTISE WITH US WIDGET TO BLOGGER.

6.10.12

0 HOW TO EDIT POSTS IN THE “NEW BLOGGER INTERFACE”.

The fact that the “New blogger interface” has been around for a while now can't be disputed.
After so many notifications from Google,it was finally disabled late last-month despite mixed feelings about it.

Myself as a person,I didn't want to believe that the “Old interface” was gone forever,making it very difficult for mobile users to manage their blogs.

Of a fact,the New interface is not suitable for a beginner to play with because its just so complicated and hard to use. Infact,there were cases of accidentally deleted blogs,and the inability to edit posts makes it worse.

But luckily,while carrying out some tests on maybe I could edit my posts,I came-up with a solution;Though,much more stressful than the way it was with the Old Dashboard.

Here's How...

Login to Blogger »» Posts.
Next,navigate to the post you want to edit and get its url.
E.g In UCBrowser,click on “1” then scroll down to select “Page Info”(as seen in the image below) and finally copy the address in “Link Address”.

Once you've gotten the post link,it will look like this ↓
http://www.blogger.com/blogger.g?blogID=5582915502189979689#editor/target=post;postID=372835895764398957;onPublishedMenu=publishedposts;onClosedMenu=publishedposts;postNum=4;src=postname

Now,delete the following from the address you get
;onPublishedMenu=publishedposts;onClosedMenu=publishedposts;postNum=4;src=postname and Copy-Paste it in your browser's address-bar.

UPDATE!(17-02-2013)

I just discovered without deleting the preceding text from the derived url,i.e onPublishedMenu=allposts;onClosedMenu=allposts;postNum=50;src=postname,the trick still works perfect.
So just get the post's url and paste in your browser's address bar.

That's all.
Kindly leave your comments,suggestions and questions behind!!!.

1.10.12

0 HOW TO LOCK AND UNLOCK MOBILE PHONES WITH FINGERPRINT.

Here's another great application with which you can secure your mobile phone.

It allows you to lock and unlock your mobile phone by just placing a finger on it.

Though literally,the software doesn't scan and save your finger-print,it locks and unlock based on the number of beeps you set in the application's settings when ANY finger is placed on it.

How Does It Work?

Like I mentioned above,the software will be set to a certain number of beeps which only you must know for security reasons.

Once the beeping is matched,will automatically unlock itself.
NOTE »
This software works on only Symbian touch-screen phones.

TIPS.
Set the beeps to a number you can easily remember and hard for others to guess.
E.g Do not set the beep to the number of letters in your name coz anyone can easily guess that.

DOWNLOAD IT HERE!

28.9.12

1 HOW TO CREATE A FACEBOOK FAN PAGE.

As we all know, social medias such as Facebook,Twitter,Linkedin etc is an effective way of generating traffic for a website/blog.

In order for your facebook friends to be aware of your site and invite others to it,it's very necessary to create a Facebook fan-page.

Note that Facebook pages are not meant for website owners alone. So,as an Actor/Actress,Musician,Organisation,Public figure etc you should consider creating one to boost your status.

Steps On How To Create and Personalize a Facebook Fan Page.

  1. Click on This Link to create a page now.
  2. Choose a category which best suits the purpose of the page and fill-in your title.
  3. Next,check the box in order to agree with the T.O.S and then select “Get Started”
  4. Enter the Captcha image shown and then proceed.
  5. Note: If you are not logged into your facebook account,you will be required to do so.
  6. Now,like the page(not necessary) and invite your friends to like it aswell.

Claim A Username For Your Page.

After successfully creating your page,you need to create a username for it. To do that,Click on this link,Select the username Facebook suggests,or enter a new one.

Once done,click on “CHECK AVAILABILITY” and then CONFIRM it if available

Choose A Profile Picture.

The next step in this tutorial is to change the default logo of the page to your business logo.

Move your mouse cursor to the default logo on the page and you will notice a list of options to change it. Click on the prefered option and browse through for your desired image. [You should re-confirm your page's category]

Add Your Blog Feed To Fan Page

If you are a blog owner,it's very necessary to add your blog's Rss Feed to the page so as to update your page each time you create a new post.

To do that,click on “Edit Page” at the top right-corner of the screen. Next,select “Apps” and then click on "Go To App". Finally,enter your FEED URL and save it.

THAT'S ALL!!. So,if you have any questions to ask,do not hesitate to use the comment box.!!

27.9.12

1 AWESOME FACEBOOK LIKE,STUMBLE,RETWEET & DIGG COUNTER WIDGET FOR BLOGS.

Here's another cool Share-buttons widget for blogs. It's a 4-in-1 share widget with an awesome look and counters.

Well,I must confess,this is one of the most widely-used Social-media widget in the Blogosphere.

It includes the Facebook Like button,Digg Counter button,Stumble and Retweet buttons.

4in1 social share button.jpg

How To Add These Buttons To Blogger

Login to Blogger.
Go to Template » Edit HTML & Check the box next to
Expand Widget Template.

Next,search for <data:post.body/> by hitting CTRL+F.
Just add the following codes directly above/before it.

<b:if cond='data:blog.pageType ==&quot;item&quot;'> <table border='0'> <tr> <td><div style='padding-top:6px;'> <script type='text/javascript'> tweetmeme_style = &quot;compact&quot;; </script> <script src='http://tweetmeme.com/i/scripts/button.js' type='text/javascript'/> </div></td> <td> <script expr:src='&quot;http://www.stumbleupon.com/hostedbadge.php?s=1&amp;r=&quot;+ data:post.url'/> </td> <td><div style='margin-left:35px;'> <script type='text/javascript'> (function() { var s = document.createElement(&#39;SCRIPT&#39;), s1 = document.getElementsByTagName(&#39;SCRIPT&#39;)[0]; s.type = &#39;text/javascript&#39;; s.async = true; s.src = &#39;http://widgets.digg.com/buttons.js&#39;; s1.parentNode.insertBefore(s, s1); })(); </script> <a class='DiggThisButton DiggCompact'/> </div></td> <td> <iframe allowTransparency='true' expr:src='&quot;http://www.facebook.com/plugins/like.php?href=&quot;+ data:post.url +&quot;&amp;layout=button_count&amp;show_faces=false&amp;width=100&amp; action=like&amp;font=arial&amp;colorscheme=light&quot;' frameborder='0' scrolling='no' style='border:none; overflow:hidden; margin-left:35px; width:100px; height:20px;'/> </td> </tr> </table> </b:if><br />

That's it. Do not forget to share your testimony with others[If it worked or not].

0 HOW TO RECOVER ACCIDENTALLY DELETED BLOGS.

After Google disabled the `Old blogger interface`,there has been cases of accidentally deleted blogs including blog-posts for newbies who do not know how to use the New interface..

Luckily,blogger has given to its users the priviledge of retrieving a deleted blog.

Here's How...

Login to Blogger. Now,in the list of blogs,you will notice a text stating the number of blogs displayed in your account at the bottom. E.g “Displaying 2 of 3 blogs" with 1 hidden” Undelete blogger blogs.jpg

Next,click on “Show All” to display all blogs including the deleted blog. Finally,click on “Undelete This Blog” and taadaa,your blog is restored.

That's all. Hope this post was handy.

26.9.12

0 HOW TO ADD “ONLINE HTML CALCULATOR” TO BLOGS.

Here's a quick tool-script you can add to your website/blog to display online calculator.

Once a number or sign is clicked on,the page reloads with the option in the text area.

Here's a demo of this online application.

Script by:SOLJAR2

So,to add this application on your blog,Copy-Paste the codes in the box below into a Page,Post or gadget.Hope you found it useful.

24.9.12

0 HOW TO KNOW AND AVOID SCAM WEBSITES.

After being scammed by two PTC/PTR sites,I decided to do a little research before venturing into another.

Luckily,I was able to get a very easy & effective trick which saved my day.

This trick involves using Google or any other search engine to review all “scam” reports of a website before actually taking the risk.

So,anytime you want to risk using a PTC/PTR or some other affiliate websites,you should first run a background check on them.

Here's How...

Get the website's url and write it in google with the text “SCAM” in front of it,in this format[Using my site as an example,though not an affiliate blog] » http://freebie-planet.blogspot.com SCAM

You can use the search box below to quickly review a website using Google search..


That's it.Thanks to Okaztle of okaztle.com for providing this tip.

22.9.12

0 HOW TO ADD “ADVERTISE WITH US” WIDGET TO BLOGS.

Nowadays,almost every blog has an “Advertise with us” widget in their sidebar. Advertise with us.jpg The widgets in most cases,are in the dimension '125 by 125' which is the most commonly used in the blogosphere.

So,if you'd like to embed this widget in your blog,all you have to do is follow these easy & straightforward steps.

Steps on how to add the advertise widget on your blog.

Before we begin with this tutorial,make sure you have a page you can direct your patronizers to when the widget is being clicked on.

If you do not already have,create one[Learn how to create a page],and specify the amount you charge for each “ad-space”. Name the page “ADVERTISE” and publish it.

Once that's done,we are ready to start.

  1. Login to Blogger
  2. Navigate to Layout » Add a gadget and selectHtml/Javascript
  3. Next,Copy-Paste the code below into the box →

    <center> <table border="0"><tr> <th width="125" height="125" align="center"> <a href="YOUR PAGE'S URL HERE" target="_blank"><img src="http://i44.tinypic.com/2v97vv9.jpg"/> </a> </th> <th width="125" height="125" align="center"> <a href="YOUR PAGE'S URL HERE" target="_blank"><img src="http://i44.tinypic.com/2v97vv9.jpg"/></a> </th> </tr> <tr> <td width="125" height="125" align="center"> <a href="YOUR PAGE'S URL HERE" target="_blank"><img src="http://i44.tinypic.com/2v97vv9.jpg"/></a> </td> <td width="125" height="125" align="center"> <a href="YOUR PAGE'S URL HERE" target="_blank"><img src="http://i44.tinypic.com/2v97vv9.jpg"/></a> </td> </tr> </table> </center>

  4. Replace all YOUR PAGE'S URL HERE in the code snippet with the one you derivated after creating your page. Likewise,you can decide to increase/decrease the widget-image's size by replacing '125' in the code.
  5. Finally, SAVE the widget.
If you encountered any challenges,please let us know...
«PREVIOUS NEXT» ¤HOME¤

 
[GET THIS]