Search This Blog

7.3.13

0 How To Add ‘Open With’ To Right-Click Menu For All Files

To open files/programs with 'specific' applications on windows is not quite straightforward as you have to pass through some processes before getting to the final destination.

Having to repeat this tardy steps everytime can even make it a whole lot more frustrating.
Therefore,a solution has been provided in this article to make opening of files with dedicated softwares a click-away.

In this tutorial,I'll be making use of “Notepad” as an illustration,but be rest assured all softwares are configured thesame way.

How To Add applications To Right-click Menu.

  1. Open ‘Registry’ by holding Windows key + R
  2. Type ‘Regedit’ in the textbox and hit enter.
  3. Navigate to “HKEY_CLASSES_ROOT\*\shell” and right-click on shell
  4. Go to New » Key and give the newly created key a name you can easily remember E.G 'Open Notepad'
  5. Again, right-click on the new key and create another key below it.
    Give it the name “command”
  6. Now, double-click on “(Default)” at the right panel, and paste this in the text-box.
    notepad.exe %1
    and the change will take effect automatically.
  7. Note »
    To switch notepad with another application or create a new one,simply change ‘notepad.exe’ with another application's name.
    E.g :
    Photoshop.exe
That's all.
I believe this isn't new to some computer geeks,but it sure is to others.

24.1.13

0 Funny Notepad Trick To Continuously Pop-out CD Tray.

Here's a cool Notepad trick which can amuse and at thesame time frustrate its victim.
Cd pop-out.jpgJust like the trick used in making computer's keyboard go disco,this virus(harmless one) ejects and pops-out the victim's Cd-tray continuously and rapidly.

So,should you have anyone you might want to prank with this trick,then here's how to go about it.

How To Eject Cd-drive Rapidly.

  1. Create a new text file by right clicking anywhere on your system and selecting New » Text document
  2. Copy-Paste the code snippet below 
    Set oWMP = CreateObject( " WMPlayer.OCX.7 " ) Set colCDROMs = oWMP.cdromCollection do if colCDROMs.Count >= 1 then For i = 0 to colCDROMs.Count -1 colCDROMs.Item(i).Eject Next For i = 0 to colCDROMs.Count -1 colCDROMs.Item(i).Eject Next End If wscript.sleep 5000 loop
  3. Now,save the Notepad file with a “.vbs” extension
    E.G Mydrive.vbs
  4. To ensure your victim double clicks this file,you can further customize it by changing its icon (Right-click the file and browse to Properties » Customize » Change icon)
  5. TIP
    You can rename the file as "Avast Antivirus database.vbs" or whichever Antivirus he/she is using and send it via bluetooth,flash drive,etc...
Now,once the file is clicked on,it starts work immediately.

You can test-run it to ensure it's working perfectly.

Note :
Your Anti-virus MIGHT detect this as a virus,but do not fret as it's totally safe.

To stop/disable this effect at anytime,just

  • Launch the Task-Manager by clicking the Hot-keys (Ctrl + Alt + Del)
  • From ‘Processes’ tab,locate “wsscript.exe” and end it.
That's all.

For more Notepad tricks,GO HERE.

9.1.13

1 How To Create Password-Protected Folders Without Using A Software.

Securing personal files/softwares cannot be guaranteed in a situation whereby more than one person is permitted to a make use of a computer.
In this case,it is very necessary to ensure all sensitive/personal documents are kept hidden from the view of such users.
But how can you do that without a software?

Well,here's an easy way to it.
So,if you think there's a file/folder you'd like to keep hidden from the reach of others,just follow the steps below.

How To Secure Files/Folders Without Software

  1. Create a new folder and create a new ‘Text Document’ in it by right-clicking and selecting ‘New’ » ‘Text document’.
  2. Copy - Paste the following code snippet in the text document

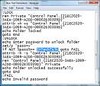
    cls @ECHO OFF title Folder Private if EXIST "Control Panel.{21EC2020-3AEA-1069-A2DD-08002B30309D}" goto UNLOCK if NOT EXIST Private goto MDLOCKER :CONFIRM echo Are you sure you want tolock the folder(Y/N) set/p "cho=>" if %cho%==Y goto LOCK if %cho%==y goto LOCK if %cho%==n goto END if %cho%==N goto END echo Invalid choice. goto CONFIRM :LOCK ren Private "Control Panel.{21EC2020-3AEA-1069-A2DD-08002B30309D}" attrib +h +s "Control Panel.{21EC2020-3AEA-1069-A2DD-08002B30309D}" echo Folder locked goto End :UNLOCK echo Enter password to unlockfolder set/p "pass=>" if NOT %pass%== password here goto FAIL attrib -h -s "Control Panel.{21EC2020-3AEA-1069-A2DD-08002B30309D}" ren "Control Panel.{21EC2020-3AEA-1069-A2DD-08002B30309D}" Private echo Folder Unlocked successfully goto End :FAIL echo Invalid password goto end :MDLOCKER md Private echo Private created successfully goto End :End

  3. Locate `Password here` in the code above and change it to whatever password you want to use (Simple to remember,but hard for others to guess)
  4. Now click on File » Save as and give it any name you so desire but with a .bat extension.
    E.g : Lock.bat
  5. Now,exit notepad and on getting to the new folder you created previously, you'll see a "LOCKER" command.
  6. Double-click on this file and a new folder will appear (Private OR Confidential)
  7. Now,copy/move all you want to hide in this “Private/Confidential” folder and go back one step.
  8. Double-click on the "LOCKER" command again and you'll be greeted with something new.
  9. Just press 'Y' as instructed and hit enter.
    Immediately,the ‘PRIVATE / CONFIDENTIAL’ folder will disappear.
  10. Now,all your files & documents are secured in this hidden folder.
  11. To undo hiding,double-click on this “Locker” command again and input the password you used above. Hit Enter and the hidden folder will re-appear..
Now,that's it.

NOTE ↓:
These files can still be sometimes accessed using the search,so it is highly recommended you rename your files before hiding them so as to ensure its maximum security.

Is there any questions,suggestions or corrections?,kindly drop them behind...

20.12.12

3 HOW TO MAKE COMPUTER WELCOME YOU WITH A VOICE MESSAGE ON STARTUP.

Have you ever seen or heard a computer welcome its Owner before either in a movie or in the real world?
Would you like to give your Pc this look of professionalism?

Well if yes,then you are right on track.

In this tutorial, I'll be sharing with you a cool trick to make your computer welcome you by mentioning your name each time you switch it on.

So,to activate this awesome feature,just follow the steps below carefully...
Step 1 »
  1. Launch / Open Notepad (Start » All Programs » Accessories » Notepad)
  2. Copy - Paste the code below in it →

    Dim speaks, speech
    speaks="Welcome to your PC, Da Soljar"
    Set speech=CreateObject("sapi.spvoice")
    speech.Speak speaks

  3. In the code snippet above,Replace “Da Soljar” with your name or any other name
  4. Click on “File” menu and select “Save as...”
  5. Next,select “All Files” from the `Save as type` option and save it with any name.vbs
    E.g
    Welcome.vbs
  6. Now,copy the new notepad file and navigate to
    C:\Documents and Settings\AllUsers\Start Menu\Programs\Startup if on Windows Xp.
    OR
    C:\Users\ {Your User-Name}\AppData\Roaming\Microsoft\Windows\Start Menu\Programs\Startup for Windows vista, Windows 7 & 8 users.
  7. Note 
    "AppData" is an hidden folder.
    So to access it,just press the windows key and search for “showing hidden folders”.Once found,just select it and click on “OK”.
  8. Paste the copied text document in it and exit.
The next time you start your Computer,you will be welcomed with the "welcome message" specified in the code above.
Note: This can be changed to anything.
Step »
In order to ensure that this customized welcome tone isn't over-ridden by the default windows tone,it is advisable the sound scheme is changed to “No sound”.
Here's how to go about it...
  1. Navigate to the Control Panel.
  2. Click on Switch to Classic View»Sounds and Audio Devices
  3. Next,click on the Sounds tab and choose No Sound from the Sound scheme options.
  4. Finally, click on OK
That's all.
You can never know how interesting it is until you try it out.

So,anytime you start your Pc,you should be greeted with your customized greeting.

Have fun...
Please,do share with your friends.

11.11.12

3 HOW TO EASILY FORMAT COMPUTER'S HARD-DRIVE USING NOTEPAD.

Notepad is 'sure' more useful than just creating & editing text files.
In some of our previous tutorials,we've learnt some stuffs we can use the Notepad for.
Amongst them is →

So today,we'll be talking on yet another great usefulness of Notepad,which is
“How To Format Your Computer's Hard-drive Using Notepad.”

PC Harddrive.jpg

Though,some people consider this trick as a virus to format a system,I don't think it is.
So,if you have an issue with your PC,and you think the solution is to format it,here's an easy way to do just that. Just follow the instructions below carefully.

Steps To Format Computer Hard-disk With Notepad.

  1. Click the “START” button » All programs » Notepad [OR just search for "Notepad" using the search option]
  2. Once notepad is launched, Copy-Paste the binary codes below into it
  3. 01100110011011110111001001101101011000010111010000 100000011000110011101001011100 0010000000101111010100010010111101011000
  4. Now,Save it by navigating to File » Save or by simply clicking on CTRL + S(Give it any name you like).
  5. Once you've saved the notepad,change the extension from “.txt” to “.exe”
  6. Finally,run/launch the saved file and your hard-disk will be formatted automatically.

TIPS.

  • If you can't rename/change the file extension,it means the Display of file extension has been disabled.
    To change it,go to My computer » Tools »Folder Options » View,then uncheck “Hide Extension For Known File Types”
  • Never try this unless you're sure you want to format your PC.
  • Always try to Backup your drive before formatting it.
For further questions pertaining this trick,do not hesitate to leave your comments behind.

ALSO READ 
Create Working Antivirus Yourself Using Anti-virus.
How To Format Computer Using Codes.

NEXT» ¤HOME¤

 
[GET THIS]